Adec / W&H WA-99 Disassembly And Repair Instructions
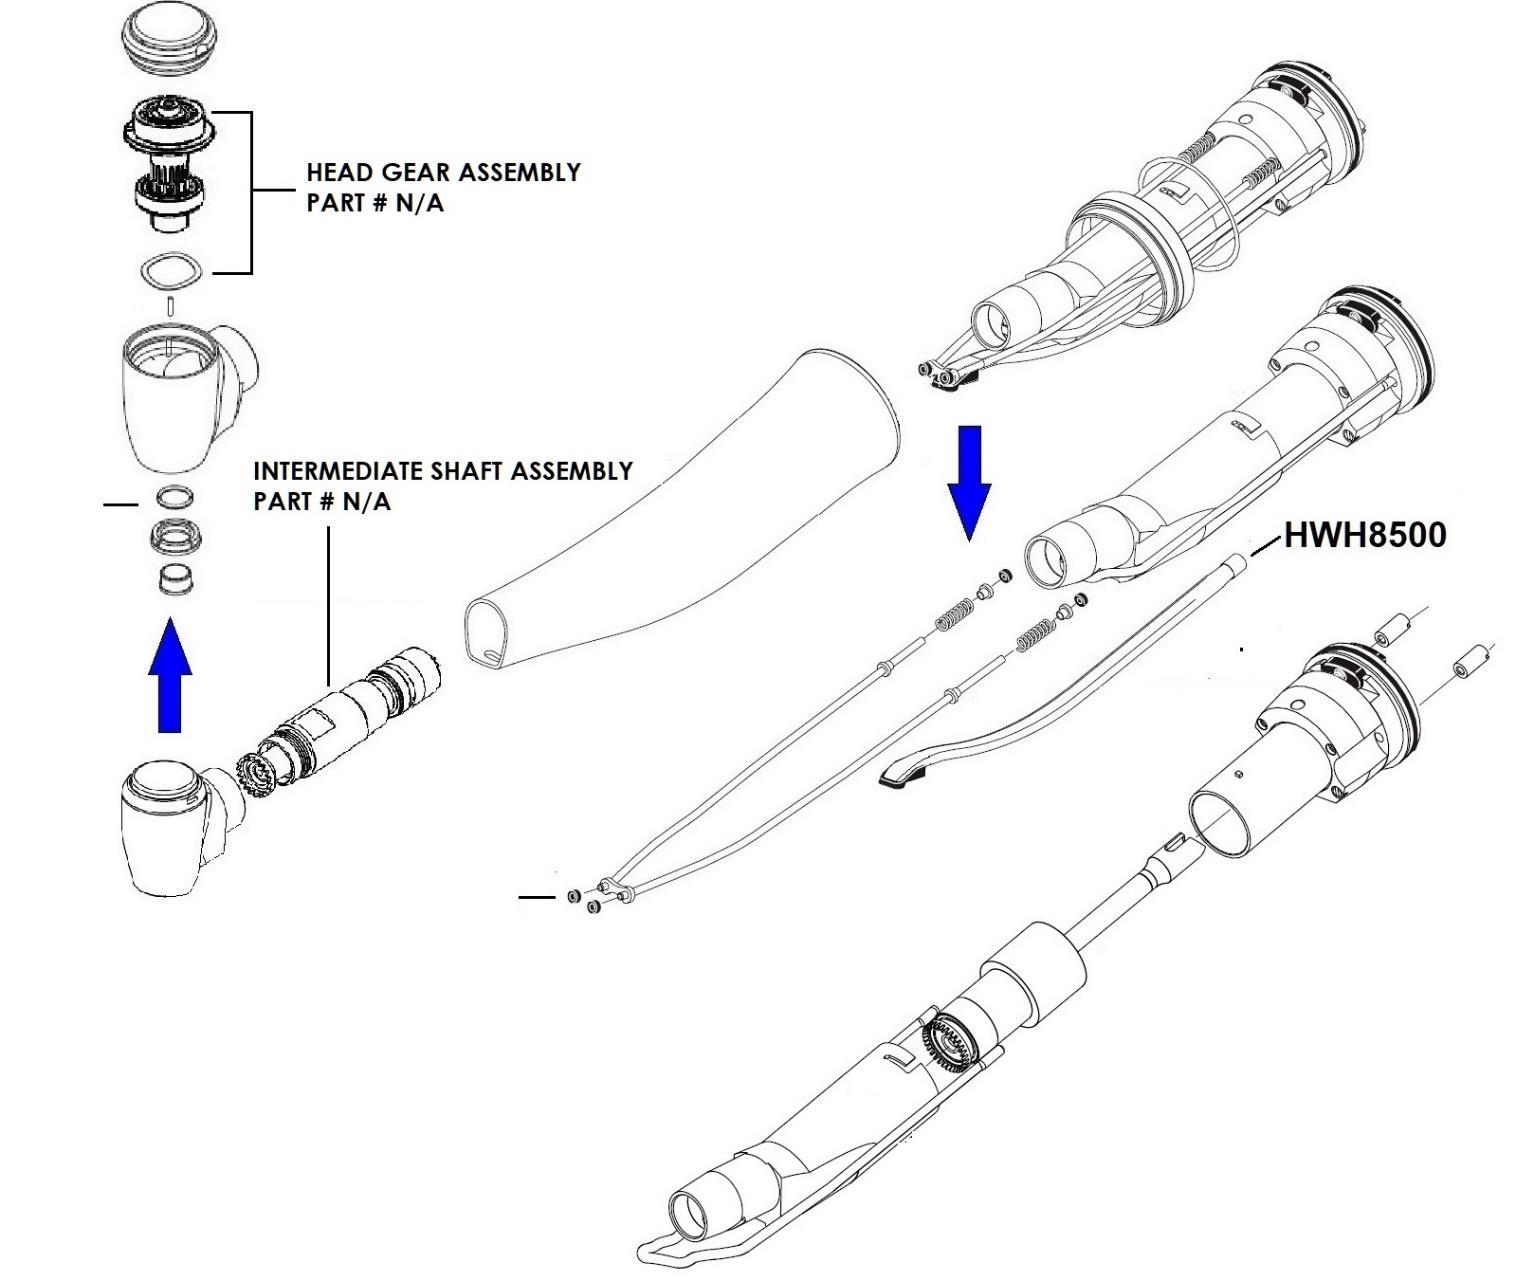
Head Gear Assembly & Intermediate Shaft
Replacement Parts Diagram For A-dec / W&H WA-99 LT (5 Ports)
Head Gear Assembly & Intermediate ShafA-dec/W&H Contra Angle – Base Block Removal
To open and remove the base block
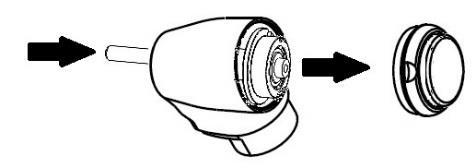
Use flat head screw driver (2.3mm) to open to screws on the back end of the handpiece and gently pull the head assembly to remove it from the handpiece body shell. (Fig. 1)

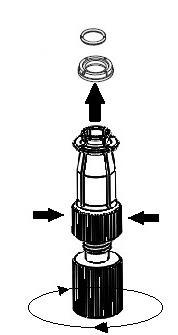
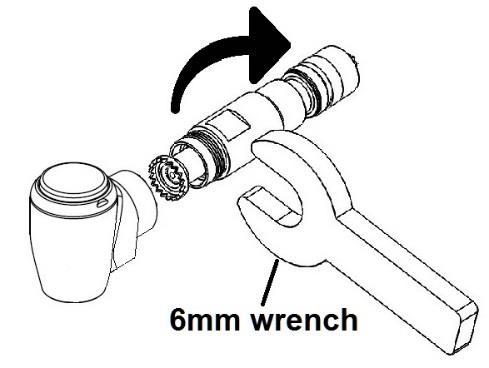
To remove intermediate shaft
Use 6mm wrench, turn counter-clockwise to open and remove the intermediate shaft from the head shell. (Fig.2)
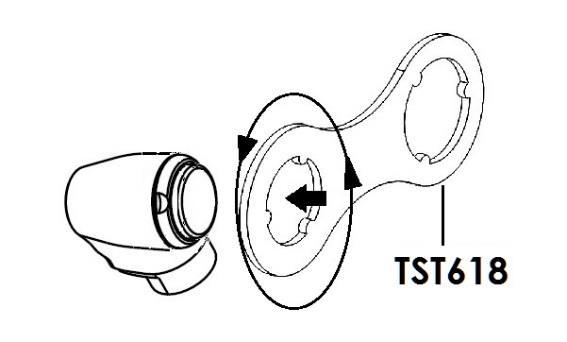
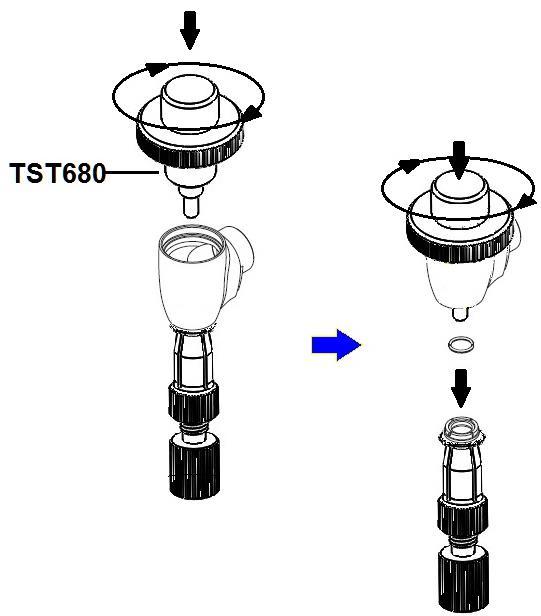
To remove head cap
Use cap wrench part number TST680; engage the cap wrench tool into the head cap and turn counter-clockwise to open and remove the head cap. (Fig. 3)
To remove the head cartridge & spring load
Use blank bur to push and revove the head cartridge (Fig. 4 & 5)
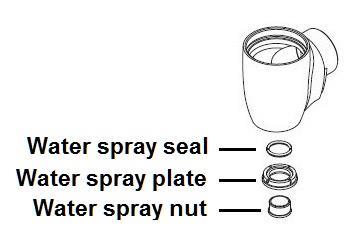
To remove the water spray nut
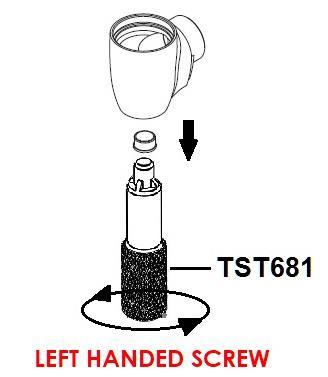
Use tool TST681 to open the water spray nut by turning clock-wise (Fig. 6)
Note: Water spray nut has Left-handed thread
Head Gear Assembly & Intermediate Shaft
Replacement Parts Diagram For A-dec / W&H WA-99 LT (5 Ports)
To remove the water spray plate and seal
Press the tool TST677 into front end of handpiece head, make sure the flange on the tool is flushed with the face of water spray plate, use your thumb and index figures to hold the front part of the tool and turn the back end of the tool clock-wise until the tool is locked into the water plate. (Fig. 7)
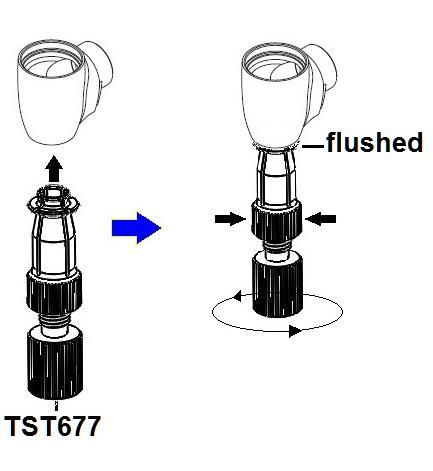
Next, use tool TST680 thread in (clock-wise) on the other side of the head shell to push the water spray plate and the tool TST677 out of handpiece shell (Fig. 8)
Next, Turn the back end of the tool TST677 counter-clockwise to un-lock the water spray plate and O- ring seal on the top of the water plate (Fig. 9)